Phoenix, React, Redux example
Integrating React and Redux with the Phoenix web framework.
Elixir Phoenix JavaScript React Redux
Why Phoenix?
Phoenix is a framework for building HTML5 apps, API backends and distributed systems. Written in Elixir, you get beautiful syntax, productive tooling and a fast runtime. – phoenixframework.org
My introduction to Phoenix came with their announcement of v1.0.
Reading about the framework, discovering it’s usage of the Elixir language and Erlang’s VM, and watching videos of its capabilities reminded me of the enthusiam I had experienced for Ruby on Rails. Elixir is often described as Erlang for Rubyists. Hence my immediate affiliation for the language.
Guiding my discovery of the Elixir language was the excellent “Programming Elixir” by Dave Thomas, from Pragmatic Programmers. A similarly titled “Programming Phoenix” by Chris McCord - author of the framework - is also available (currently in Beta format). Both are highly recommended resources.
Why React and Redux?
React is a JavaScript library, from Facebook, for building user interfaces. It is commonly thought of as the V in an MVC architecture. It’s stated design goal is to solve one problem: building large applications with data that changes over time. I’ve previously written about my interest in combination with D3 for charting. I may be in the minority of JavaScript developers who embraces the JSX format.
Redux is an implementation of Facebook’s Flux architecture. In their own words, Redux is a predictable state container for JavaScript apps. I became aware of the library and interested to learn more, when a former colleague - James Hollingworth, author of the Flux library Marty - deprecated his own project and recommended Redux.
Elixir and Redux both have an emphasis on functional programming and immutable data. They appear well suited together.
This guide demonstrates the integration of React, Redux and Phoenix channels using a TODO example. The functionality is basic; but can be used as a prototype for more complex applications.
After each section, a link is provided to the corresponding Git commit (on GitHub).
A demo is shown at the end of the article.
Getting started
If you want to run the example Phoenix application, you will need the following prerequisites.
- Install Elixir and Erlang
- Install Node.js and npm
- Clone the phoenix-react-redux-example Git repository
Installing Phoenix
Phoenix v1.0.3 was the latest version at the time of publishing.
mix archive.install https://github.com/phoenixframework/phoenix/releases/download/v1.0.3/phoenix_new-1.0.3.ez
Creating a new Phoenix project
Use the phoenix.new mix command to create a new project. We’ll be using webpack instead of Brunch for front-end asset packaging. Ecto is also excluded as this example does not require a database.
mix phoenix.new phoenix_react_redux_example --no-brunch --no-ecto
Install Phoenix depedencies and start the server.
cd phoenix_react_redux_example
mix deps.get
mix phoenix.server
 Initial commit after generating new Phoenix app
Configuring front-end dependencies
Create a package.json file, using the npm init command. Install the following front-end libraries using npm install.
Create the webpack configuration file webpack.config.js to package the JavaScript assets. Use the babel loader including both es2015 and react presets to add support for ES6 and React’s JSX format.
Webpack is configured to load web/static/js/index.js and output to priv/static/js. This is served as a static asset by Phoenix.
webpack --watch --color
The main Phoenix layout template (web/templates/layout/app.html.eex) contains a script tag to load the single concatenated app.js file.
<script src="<%= static_path(@conn, "/js/app.js") %>"></script>
Basic React application
To demonstrate the front-end asset pipeline has been correctly configured I included the basic React TODO example.
The entry file web/static/js/index.js loads the React container App component and renders it to the element with the id root. ES6 import statements are used for module loading.
import React from 'react';
import { render } from 'react-dom';
import App from './containers/App';

render(
  <App />,
  document.getElementById('root')
);Redux/React integration
Integrating Redux followed the Usage with React guide in the Redux documentation.
Actions
Create the action type constants and action creator factory functions in web/static/js/actions.js.
/*
 * action types
 */

export const ADD_TODO = 'ADD_TODO';
export const COMPLETE_TODO = 'COMPLETE_TODO';
export const SET_VISIBILITY_FILTER = 'SET_VISIBILITY_FILTER';

/*
 * other constants
 */

export const VisibilityFilters = {
  SHOW_ALL: 'SHOW_ALL',
  SHOW_COMPLETED: 'SHOW_COMPLETED',
  SHOW_ACTIVE: 'SHOW_ACTIVE'
};

/*
 * action creators
 */

export function addTodo(text) {
  return { type: ADD_TODO, text }
}

export function completeTodo(index) {
  return { type: COMPLETE_TODO, index }
}

export function setVisibilityFilter(filter) {
  return { type: SET_VISIBILITY_FILTER, filter }
}
Reducers
Write the reducer functions in web/static/js/reducers.js to handle these actions and return new state in response.
A reducer is a pure function that takes the previous state and an action, and returns the next state: (previousState, action) => newState. Since the reducer is pure, it must not mutate it’s arguments.
Each reducer is combined together using the combineReducers function from Redux.
import { combineReducers } from 'redux';
import { ADD_TODO, COMPLETE_TODO, SET_VISIBILITY_FILTER, VisibilityFilters } from './actions';
const { SHOW_ALL } = VisibilityFilters;

function visibilityFilter(state = SHOW_ALL, action) {
  switch (action.type) {
    case SET_VISIBILITY_FILTER:
      return action.filter;
    default:
      return state;
  }
}

function todos(state = [], action) {
  switch (action.type) {
    case ADD_TODO:
      return [
        ...state,
        {
          text: action.text,
          completed: false
        }
      ];
    case COMPLETE_TODO:
      return [
        ...state.slice(0, action.index),
        Object.assign({}, state[action.index], {
          completed: true
        }),
        ...state.slice(action.index + 1)
      ];
    default:
      return state;
  }
}

const todoApp = combineReducers({
  visibilityFilter,
  todos
});

export default todoApp;
Redux store
Create a store using createStore from Redux and pass it the combined reducers.
Wrap the React container App component with the react-redux Provider and the created Redux store.
import React from 'react';
import { render } from 'react-dom';
import { createStore } from 'redux'
import { Provider } from 'react-redux'
import App from './containers/App';
import todoApp from './reducers';

let store = createStore(todoApp);

render(
  <Provider store={store}>
    <App />
  </Provider>,
  document.getElementById('root')
);
Dispatching actions
Redux recommends that only container components are aware of Redux (so-called “smart” components). Whereas presentation components are “dumb” and should have no depedencies on the rest of the application or stores.
The container App component is provided with a dispatch function, via this.props.dispatch, that is injected via the connect call.
Dispatch calls are passed as props to “dumb” child components. The action creator functions are used to provide arguments to dispatch.
import React, { Component, PropTypes } from 'react';
import { connect } from 'react-redux';
import { addTodo, completeTodo, setVisibilityFilter, VisibilityFilters } from '../actions';
import AddTodo from '../components/AddTodo';
import TodoList from '../components/TodoList';
import Footer from '../components/Footer';

class App extends Component {
  render() {
    // Injected by connect() call:
    const { dispatch, visibleTodos, visibilityFilter } = this.props;
    return (
      <div>
        <AddTodo
          onAddClick={text =>
            dispatch(addTodo(text))
          } />
        <TodoList
          todos={visibleTodos}
          onTodoClick={index =>
            dispatch(completeTodo(index))
          } />
        <Footer
          filter={visibilityFilter}
          onFilterChange={nextFilter =>
            dispatch(setVisibilityFilter(nextFilter))
          } />
      </div>
    );
}

// Select and return the props from global state that are required by this component
function select(state) {
  return {
    visibleTodos: selectTodos(state.todos, state.visibilityFilter),
    visibilityFilter: state.visibilityFilter
  };
};

// Wrap the component to inject dispatch and state into it
export default connect(select)(App);
Redux is now fully integrated with React in the example TODO application.
Async actions using Thunk middleware for Redux
Redux Thunk middleware (redux-thunk) allows you to write action creators that return a function instead of an action. We can use this to add support for asynchronous action creators to Redux (since it only has support for synchronous action creators).
The store is created and wrapped with the thunk middleware, before being passed to the Redux Provider as before.
import React from 'react';
import { render } from 'react-dom';
import thunkMiddleware from 'redux-thunk';
import { createStore, applyMiddleware } from 'redux';
import { Provider } from 'react-redux';
import App from './containers/App';
import todoApp from './reducers';

const loggerMiddleware = createLogger();

const createStoreWithMiddleware = applyMiddleware(
  thunkMiddleware // lets us dispatch() functions
)(createStore);

const store = createStoreWithMiddleware(todoApp);

render(
  <Provider store={store}>
    <App />
  </Provider>,
  document.getElementById('root')
);
Sending requests to an external service, e.g. a REST API or via a web socket connection, requires three action types. The request, a success response and a failure response.
export const ADD_TODO_REQUEST = 'ADD_TODO_REQUEST';
export const ADD_TODO_SUCCESS = 'ADD_TODO_SUCCESS';
export const ADD_TODO_FAILURE = 'ADD_TODO_FAILURE';

function addTodoRequest(text) {
  return { type: ADD_TODO_REQUEST, text };
}

function addTodoSuccess(text) {
  return { type: ADD_TODO_SUCCESS, text };
}

function addTodoFailure(text, error) {
  return { type: ADD_TODO_FAILURE, text, error };
}

export function addTodo(text) {
  return dispatch => {
    dispatch(addTodoRequest(text));

    // send request, then on success
    dispatch(addTodoSuccess(text));

    // .. or on failure
    dispatch(addTodoFailure(text, error));
  };
}
The request action type can be used to allow the UI to render a pending state.
Async dispatch using redux-thunk middleware
Phoenix sockets (web sockets) and channels
Channels are the Phoenix abstraction around Web Sockets - providing real-time streaming - allowing you to create interactive, multi-user web applications. Since Phoenix runs on the Erlag VM, it can support a high number of simultaneous connections. A recent blog post titled “The Road to 2 Million Websocket Connections in Phoenix” confirms its performance.
Phoenix provides an Endpoint module to configure any socket handlers.
# lib/phoenix_react_redux_example/endpoint.ex
defmodule PhoenixReactReduxExample.Endpoint do
  use Phoenix.Endpoint, otp_app: :phoenix_react_redux_example

  socket "/ws", PhoenixReactReduxExample.UserSocket

  # ...
end
Configure socket in JavaScript
Phoenix provides a JavaScript API to its channels abstration.
To import the Socket type from the Phoenix client library, add an alias to the webpack.config.js file that maps to the phoenix.js file in the top-level deps folder. This folder contains all the dependencies installed with mix, including Phoenix.
// webpack.config.js
resolve: {
    alias: {
      phoenix: __dirname + '/deps/phoenix/web/static/js/phoenix.js'
    }
  },
The Phoenix Socket is used to connect to the server, via a web socket, and join channels.
import { Socket } from 'phoenix';

export function configureChannel() {
  let socket = new Socket('/ws');
  socket.connect();

  let channel = socket.channel('todos');

  channel.on('new:todo', msg => console.log('new:todo', msg));

  channel.join()
    .receive('ok', messages => console.log('catching up', messages))
    .receive('error', reason => console.log('failed join', reason))
    .after(10000, () => console.log('Networking issue. Still waiting...'));
}
With these client changes made, refreshing the web browser will initiate a permanent web socket connection to the server.
Configure web socket connection to Phoenix channel
Phoenix channel
Channels handle events from clients and connections persist beyond a single request/response cycle. Channels are the highest level abstraction for realtime communication components in Phoenix.
Server
Given the following socket definition with a single todos:* channel route (* matches anything).
defmodule PhoenixReactReduxExample.TodoSocket do
  use Phoenix.Socket

  channel "todos:*", PhoenixReactReduxExample.TodoChannel

  transport :websocket, Phoenix.Transports.WebSocket

  def connect(_params, socket) do
    {:ok, socket}
  end

  def id(_socket), do: nil
end
The corresponding channel handles new clients joining and receiving a new:todo push message from any client.
In response, all connected clients are notified of the new TODO message via the broadcast! call.
defmodule PhoenixReactReduxExample.TodoChannel do
  use PhoenixReactReduxExample.Web, :channel

  def join("todos:" <> todo_id, _params, socket) do
    {:ok, assign(socket, :todo_id, todo_id) }
  end

  def handle_in("new:todo", params, socket) do
    broadcast! socket, "new:todo", %{
      text: params["text"]
    }

    {:reply, :ok, socket}
  end
end
Client
On the client, configure the socket and connect to the todos channel by calling the previously defined configureChannel.
Add a new subscribeTodos function to handle receiving the new items broadcast from the server.
The addTodo action creator function is modified to push the new TODO text to the server via the configured channel. Only errors need to be handled by the push call. The newly created item will be received via the new:todo subscription and dispatched.
import { configureChannel } from './channel';

let channel = configureChannel();

export function subscribeTodos() {
  return dispatch => {
    channel.on('new:todo', msg => {
      dispatch(addTodoSuccess(msg.text));
    });
  };
}

export function addTodo(text) {
  return dispatch => {
    dispatch(addTodoRequest(text));

    let payload = {
      text: text
    };

    // add todo
    channel.push('new:todo', payload)
      .receive('ok', response => {
        console.log('created TODO', response);
      })
      .receive('error', error => {
        console.error(error);
        dispatch(addTodoFailure(text, error));
      });
  };
}
The App component dispatches the action to subscribe to the new items when the component is mounted.
import { subscribeTodos, addTodo, completeTodo, setVisibilityFilter, VisibilityFilters } from '../actions';

class App extends Component {
  componentDidMount() {
    let { dispatch } = this.props;

    dispatch(subscribeTodos());
  }

  // ...
}
With these changes made, mutliple users can connect to the server and receive notifications of newly added TODOs while the page is open. The next step is to add persistence to the TODO list.
Todo socket and channel for realtime TODO notifications
Elixir Agent for persistence
Agents are a simple abstraction around state. – elixir-lang.org
The Elixir agent simply stores a list of items in memory. It provides an API to get all the items and add a new item.
defmodule PhoenixReactReduxExample.TodoServer do
  def start_link do
    Agent.start_link(fn -> [] end, name: __MODULE__)
  end

  @doc "Get list of all TODOs"
  def all() do
    Agent.get(__MODULE__, fn todos -> todos end)
  end

  @doc "Add a new incomplete TODO"
  def add(text) do
    todo = %{
      :text => text,
      :completed => false
    }
    Agent.update(__MODULE__, fn todos -> todos ++ [todo] end)
  end
Server
This agent is added to the Phoenix application’s supervisor so that it is started with the server.
defmodule PhoenixReactReduxExample do
  use Application

  def start(_type, _args) do
    import Supervisor.Spec, warn: false

    children = [
      supervisor(PhoenixReactReduxExample.Endpoint, []),

      # Our TODO Agent for persistence
      worker(PhoenixReactReduxExample.TodoServer, [])
    ]

    opts = [strategy: :one_for_one, name: PhoenixReactReduxExample.Supervisor]
    Supervisor.start_link(children, opts)
  end
end
Integrating the agent into our channel is straightforward. When a client joins the todos channel they receive the entire list of items. When a new item is pushed to the server, it is added to the agent’s state and broadcast to all connected clients (new:todo).
defmodule PhoenixReactReduxExample.TodoChannel do
  use PhoenixReactReduxExample.Web, :channel

  alias PhoenixReactReduxExample.TodoServer

  def join("todos", _params, socket) do
    todos = TodoServer.all()

    # send list of items to client
    {:ok, %{ todos: todos }, socket }
  end

  def handle_in("new:todo", params, socket) do
    todo = params["text"]

    TodoServer.add(todo)

    # notify all connected clients
    broadcast! socket, "new:todo", %{
      text: todo
    }

    {:noreply, socket}
  end
end
Client
On the client, we intially fetch the items by joining the todos channel. The messages received - containing the list of items - once connected is dispatched through fetchTodosSuccess.
// web/static/js/actions.js
import { configureChannel } from './channel';

let socket = configureChannel();
let channel = socket.channel('todos');

export function fetchTodos() {
  return dispatch => {
    dispatch(fetchTodosRequest());

    channel.join()
      .receive('ok', messages => {
        console.log('catching up', messages);
        dispatch(fetchTodosSuccess(messages.todos));
      })
      .receive('error', reason => {
        console.log('failed join', reason);
        dispatch(fetchTodosFailure(reason));
      })
      .after(10000, () => console.log('Networking issue. Still waiting...'));

    // subscribe to receive new items
    channel.on('new:todo', msg => {
      console.log('new:todo', msg);
      dispatch(addTodoSuccess(msg.text));
    });
  };
}
The reducer function returns the new state. Creating a new, empty array concatenated with the list of items.
// web/static/js/reducers.js
function todos(state = [], action) {
  switch (action.type) {
    case FETCH_TODOS_SUCCESS:
      return [].concat(action.todos);

    // ...
  }
}
Redux and React handle updating the UI in response to the state change.
That completes the end-to-end example of a multi-user TODO application using React, Redux and Phoenix channels.
Elixir agent to persist TODO state in memory
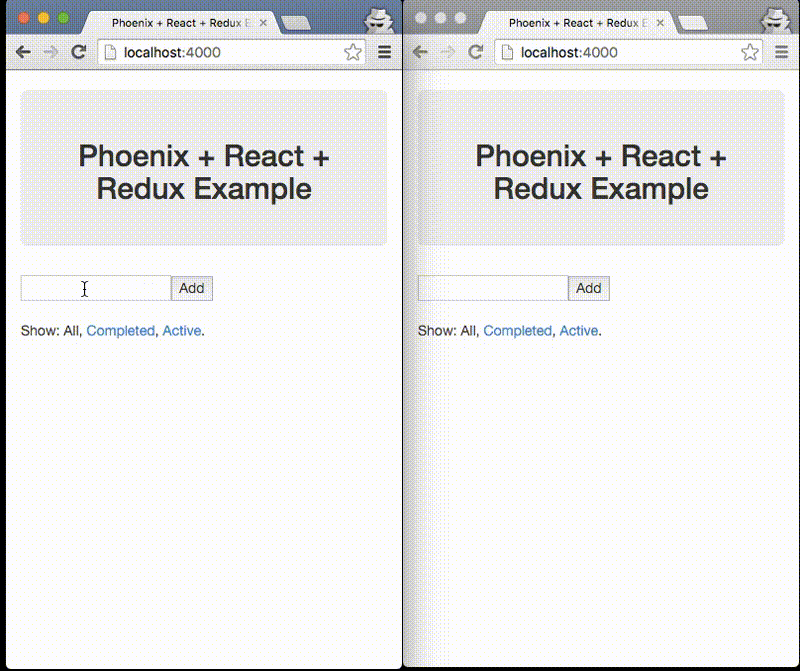
Demo
An example of two users simultaneously connected, with new items being added. Both browsers are refreshed to show that state is persisted between reloads.